


How to Wear A Wig Cap Like A Pro--MUST SEE
Don’t wanna have bumps or uneven places once you have your wig on? Then your hair has to be flat enough on your head to allow you to place the wig cap properly so that your wig can sit perfectly.
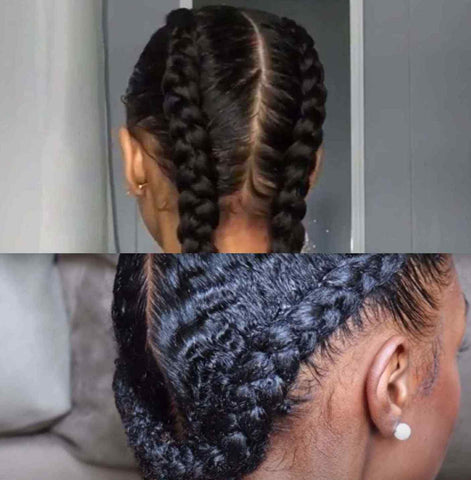
For long hair and thin hair, you can part your hair down the middle and braid each side separately. Secure each braid with a hair tie, then criss cross them against the back of your head. Pull the tails up behind your ears and use bobby pins to secure the braids in place on top of your scalp. If you have long and thick hair, you can split your hair into more sections before braiding it. For example, if you make 4 braids, they’ll lay flatter against your head.
Shorter hair can be applied gel to make it easier to tuck under the cap. If your hair is too short to cornrow, then get a strong hair gel that can hold your hair down with the aid of a leave-in conditioner. Apply more gel to areas that tend to have more flyaways, like around your hairline or the nape of your neck. Next is to use hairbrush to flatten your hair, tie your hair with a satin scarf, and leave it to dry completely.  2. Prepare Your Skin
Wipe the skin around your hairline with a cotton pad dipped in alcohol solution. This removes any access oils and impurities from your skin, which will help the glue or adhesive tape stick better to your skin.
3. Put On A Wig Cap
Align the wig cap with your natural hairline on the front of your head. Make sure all of your natural hair is completely covered by the cap and eventually the wig. If you have an uneven hairline, place the edge of the wig cap along the lowest part of your hairline so that none of your hair is showing.
Once your cap is lined up properly in the front, stretch it snugly over your hair. Continue pulling it down until the bottom of the cap hits right where the base of your head and the top of your neck meet.
4. Use The Glue
Use any hair glue of your choice to hold down the edges of your wig cap and make sure it’s well-aligned with your hairline. Remember to let it dry before placing the unit on your head. You can also use bobby pins to secure the wig cap to your head. Shop Got2B >>

5. Cut The Edge of Cap
Angle your scissors while using your second hand to keep the wig cap in place. Cut out the edge of the wig cap until it gets to the other cuts you made by your ears. Smoothen the edge of your wig ap as much as you can.

6. Fit Your Skin Stone
Pull out your foundation and blend in a reasonable amount around your hairline. This plays an important role in making your wig look natural. Your foundation is the best option because it’ll easily blend with your skin tone.
7. Apply A Wig
To apply the unit, carefully place it on your head, being sure to keep stray hairs out of the glue and press the lace into the glue or adhesive. Firmly press the wig down, all the way around, until you are satisfied you've secured the wig to the adhesives. Make sure none of the lace is lifting up when you are done. If one area is lifting, use a Q-tip to add an extra dot of glue and test to ensure the wig is secure once again.
8. Baby Hair
Spray some mousse on your hairline and then use a toothbrush to arrange your baby hairs to make it look even more natural. 
Comments
Sphiwe said:
How to remove the glue on hair after using it